考试系统:考试微服务
这节我们来实现考试微服务的功能。
首先创建考试表:
| 字段名 | 数据类型 | 描述 |
|---|---|---|
| id | INT | 考试ID |
| createUserId | INT | 创建者ID |
| name | VARCHAR(50) | 考试名 |
| isPublish | BOOLEAN | 是否发布 |
| isDelete | BOOLEAN | 是否删除 |
| content | TEXT | 试卷内容 JSON |
| create_time | DATETIME | 创建时间 |
| update_time | DATETIME | 更新时间 |
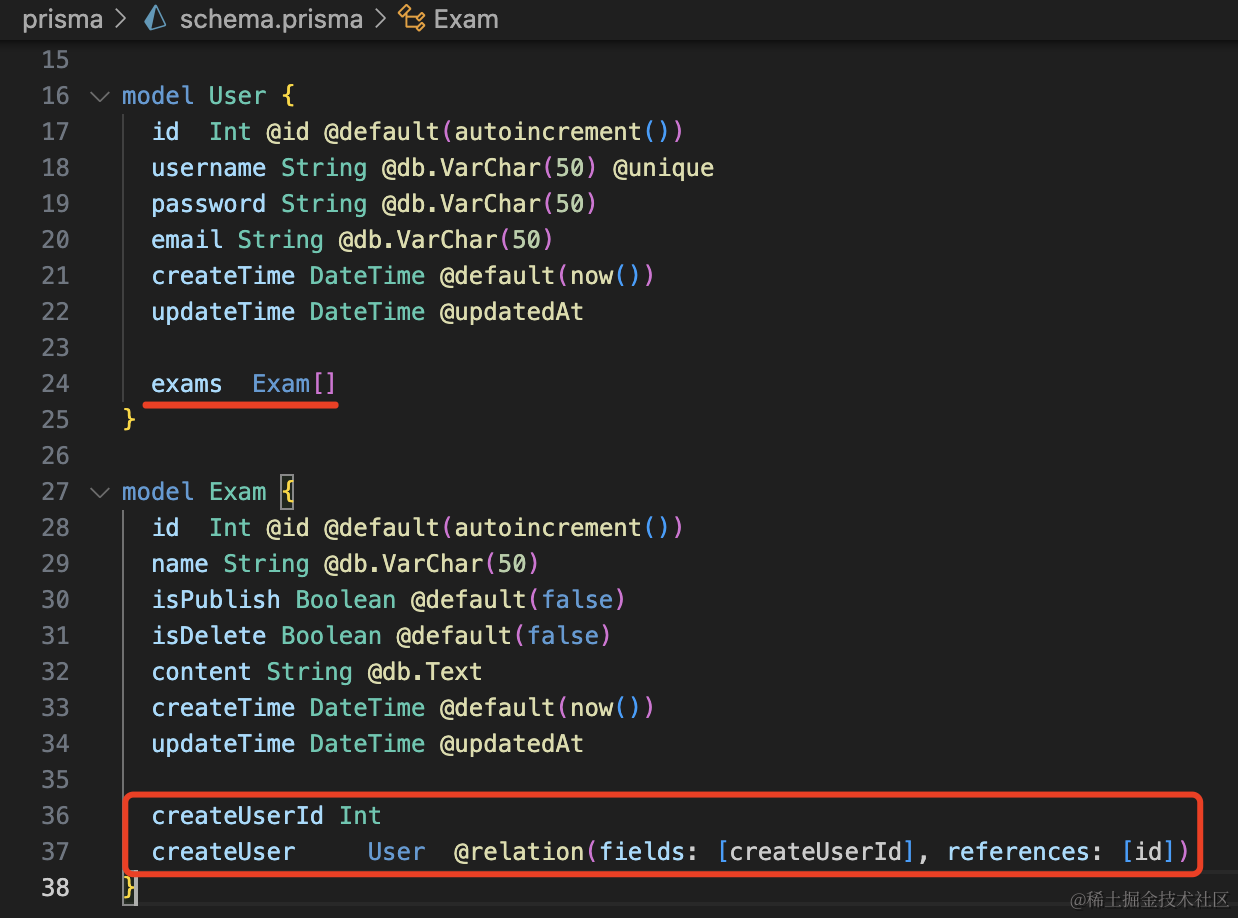
改下 prisma 的 shema 文件:
model User {
  id  Int @id @default(autoincrement())
  username String @db.VarChar(50) @unique
  password String @db.VarChar(50)
  email String @db.VarChar(50)
  createTime DateTime @default(now())
  updateTime DateTime @updatedAt

  exams  Exam[]
}

model Exam {
  id  Int @id @default(autoincrement())
  name String @db.VarChar(50)
  isPublish Boolean @default(false)
  isDelete Boolean @default(false)
  content String @db.Text
  createTime DateTime @default(now())
  updateTime DateTime @updatedAt

  createUserId Int
  createUser     User  @relation(fields: [createUserId], references: [id])
}
除了基本字段外,还要加一个多对一的关联:
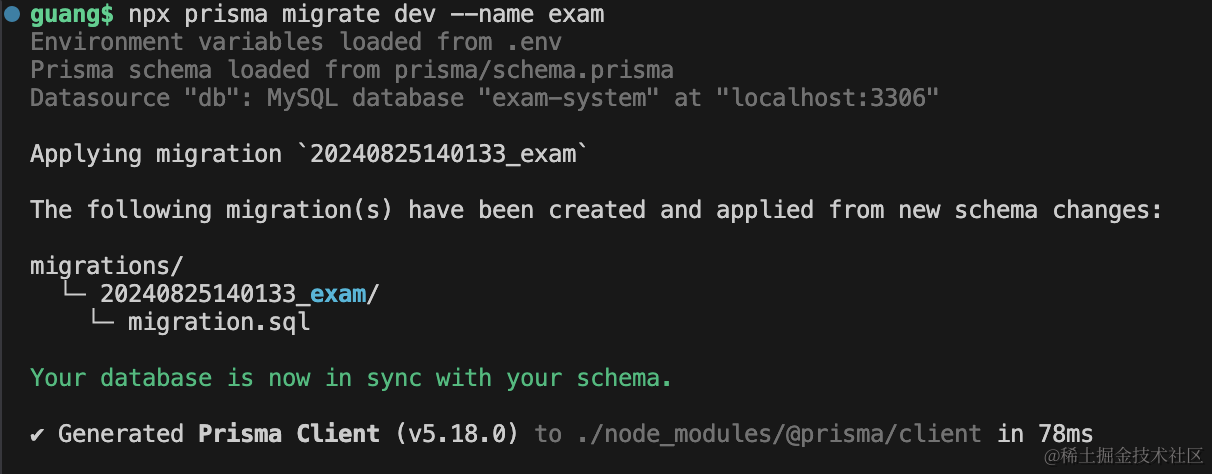
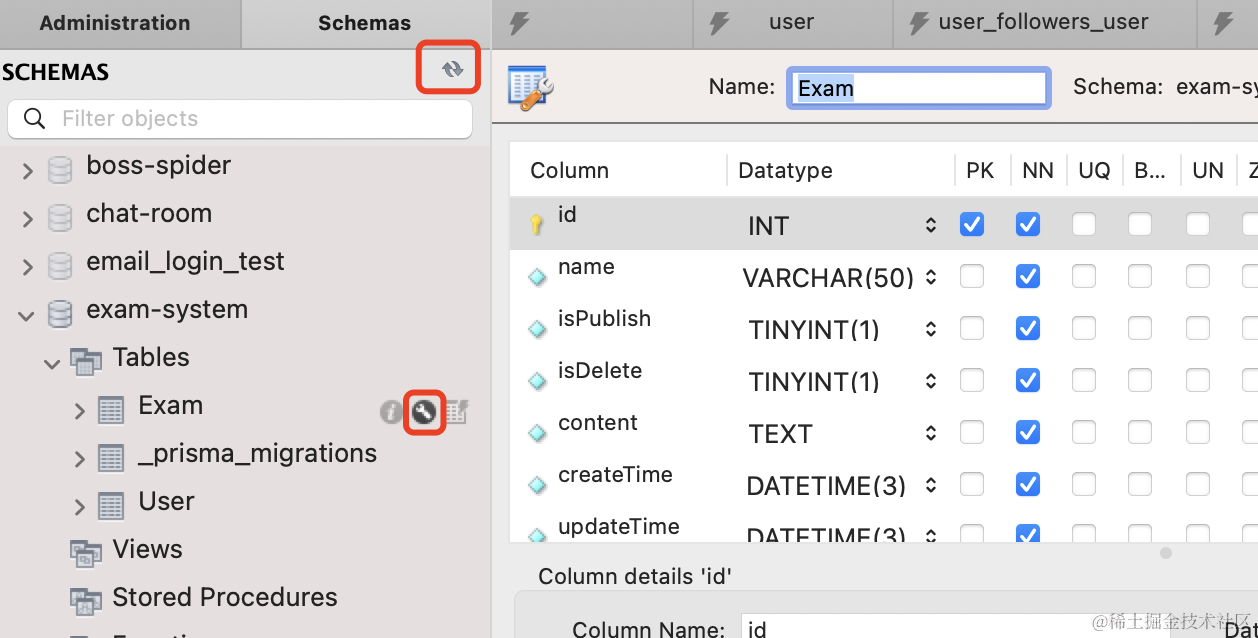
生成这个表:
npx prisma migrate dev --name exam

然后实现下 exam 的几个接口:
| 接口路径 | 请求方式 | 描述 |
|---|---|---|
| /exam/add | POST | 创建考试 |
| /exam/delete | DELETE | 删除考试 |
| /exam/list | GET | 考试列表 |
| /exam/save | POST | 保存试卷内容 |
| /exam/publish | GET | 发布考试 |
在 exam 微服务改一下 ExamController:
@Post('add')
@RequireLogin()
async add(@Body() dto: ExamAddDto, @UserInfo('userId') userId: number) {
    return this.examService.add(dto, userId);
}
创建考试需要关联用户,所以需要登录,拿到用户信息。
加一下全局的 Guard:
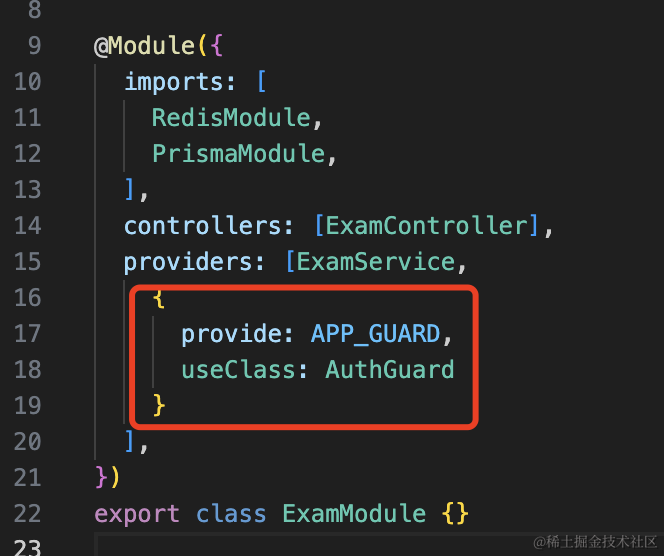
{
  provide: APP_Guard,
  useClass: AuthGuard
}
创建用到的 dto:
dto/exam-add.dto.ts
import { IsNotEmpty } from "class-validator";

export class ExamAddDto {
    @IsNotEmpty({ message: "考试名不能为空" })
    name: string;
}
还有 service:
引入 PrismaModule:
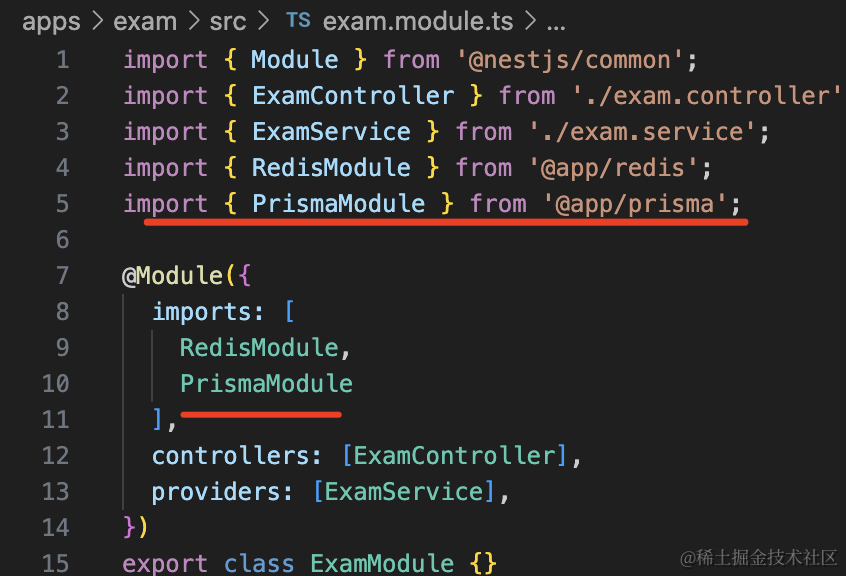
注入 PrismaService,实现关联插入:
import { Inject, Injectable } from "@nestjs/common";
import { ExamAddDto } from "./dto/exam-add.dto";
import { PrismaService } from "@app/prisma";

@Injectable()
export class ExamService {
    getHello(): string {
        return "Hello World!";
    }

    @Inject(PrismaService)
    private prismaService: PrismaService;

    async add(dto: ExamAddDto, userId: number) {
        return this.prismaService.exam.create({
            data: {
                name: dto.name,
                content: "",
                createUser: {
                    connect: {
                        id: userId,
                    },
                },
            },
        });
    }
}
然后在 main.ts 加一下 ValidationPipe:
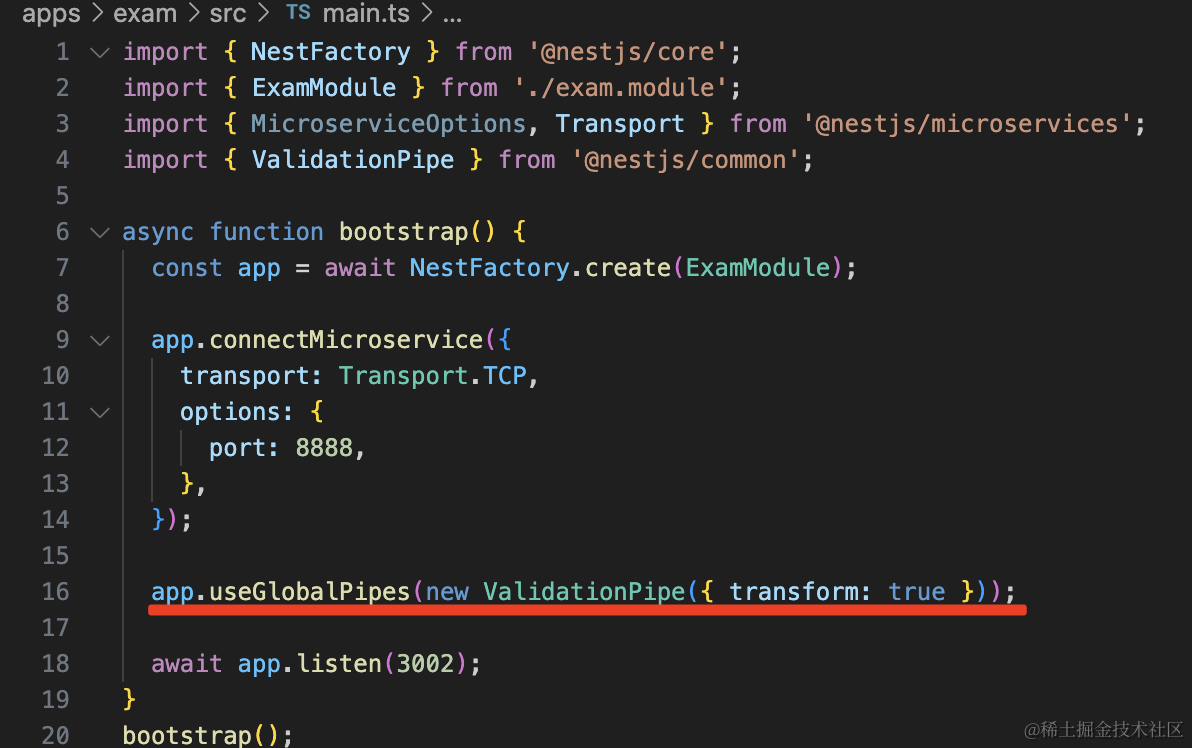
app.useGlobalPipes(new ValidationPipe({ transform: true }));
把 user 和 exam 服务跑起来:
npm run start:dev user
npm run start:dev exam
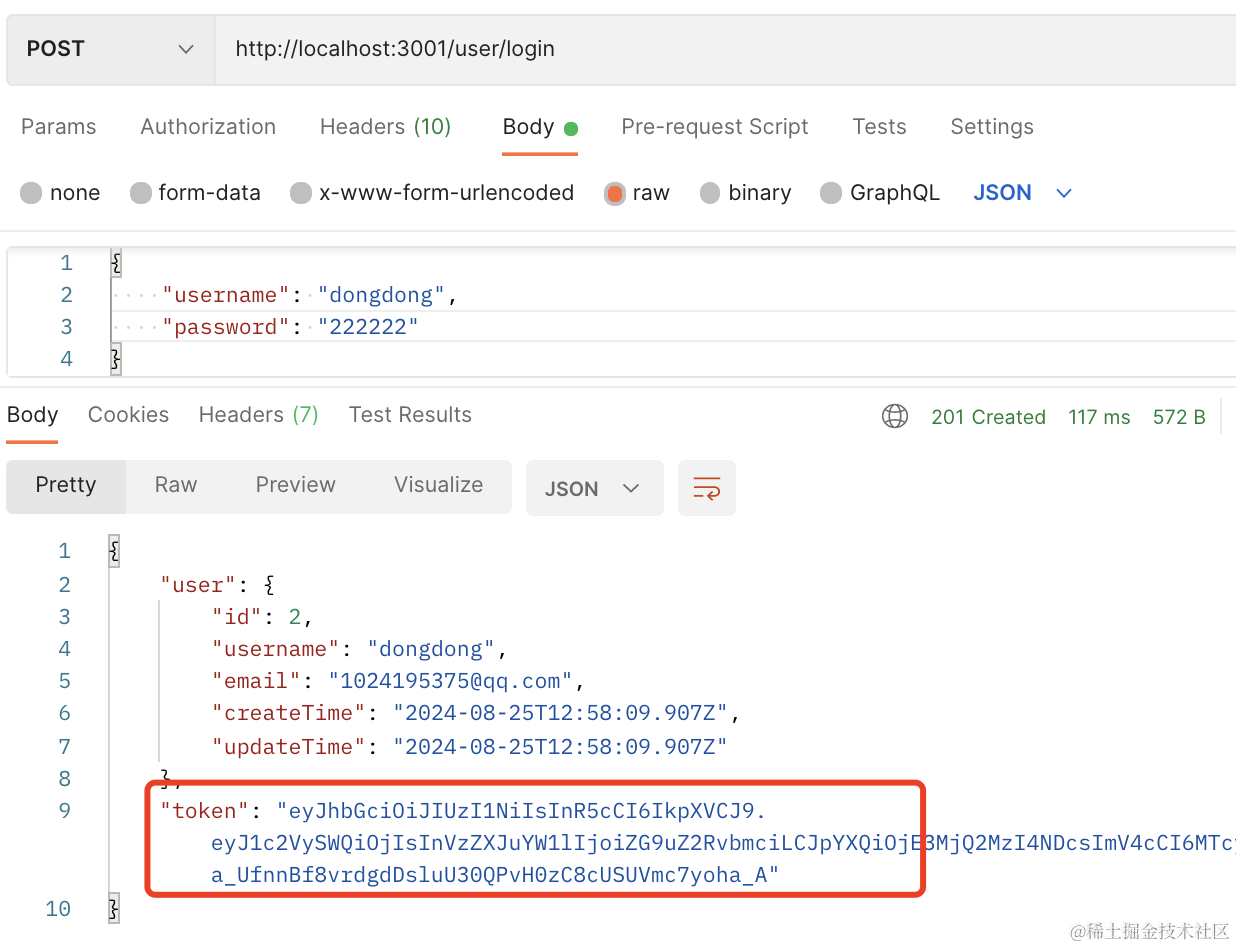
测试下:
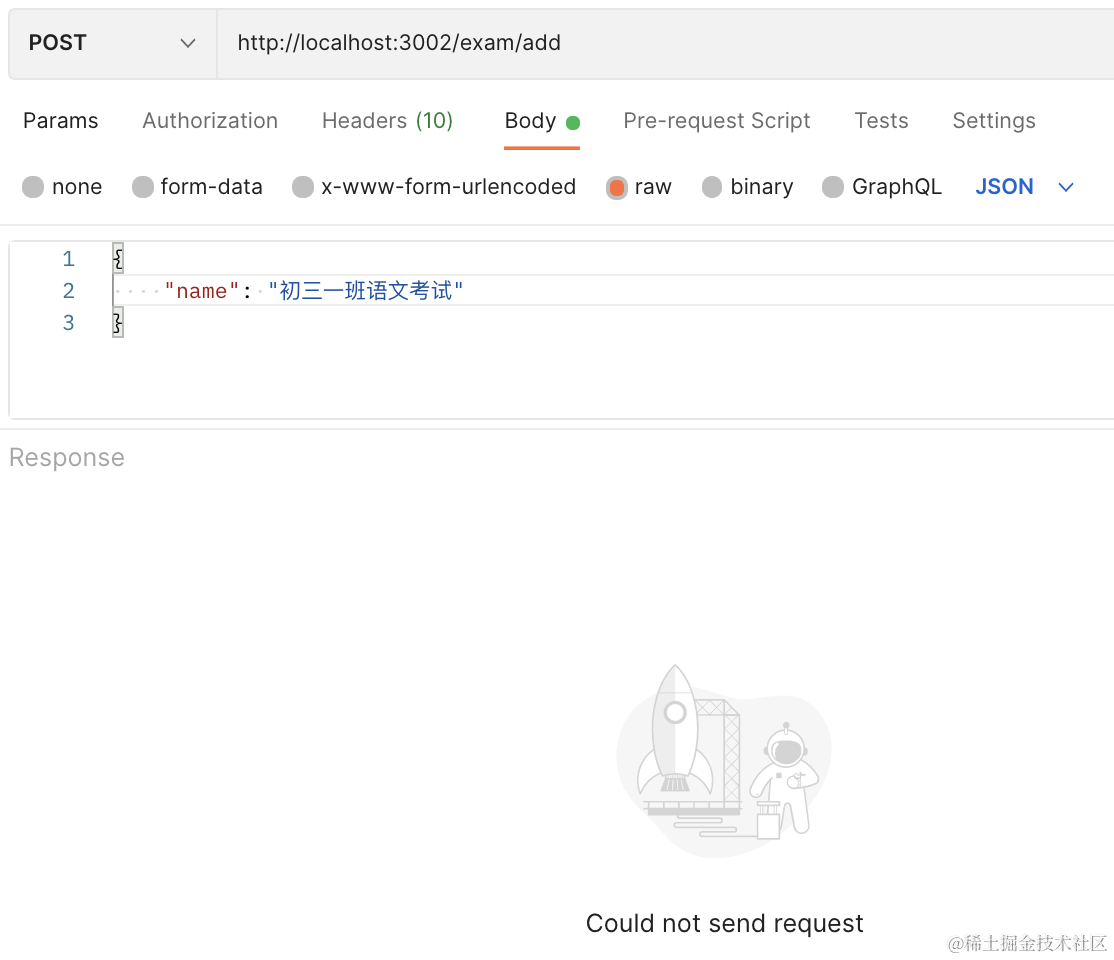
它会提示你找不到 JwtService:
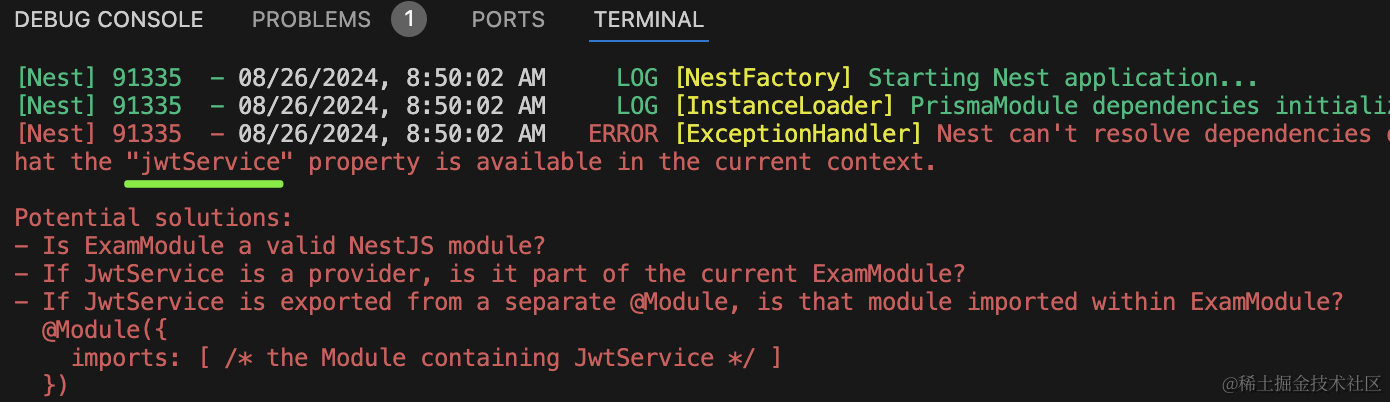
我们之前在 UserModule 用的时候是引入了 JwtModule 所以才能找到:
但每个微服务都引入 JwtService 明显不好。
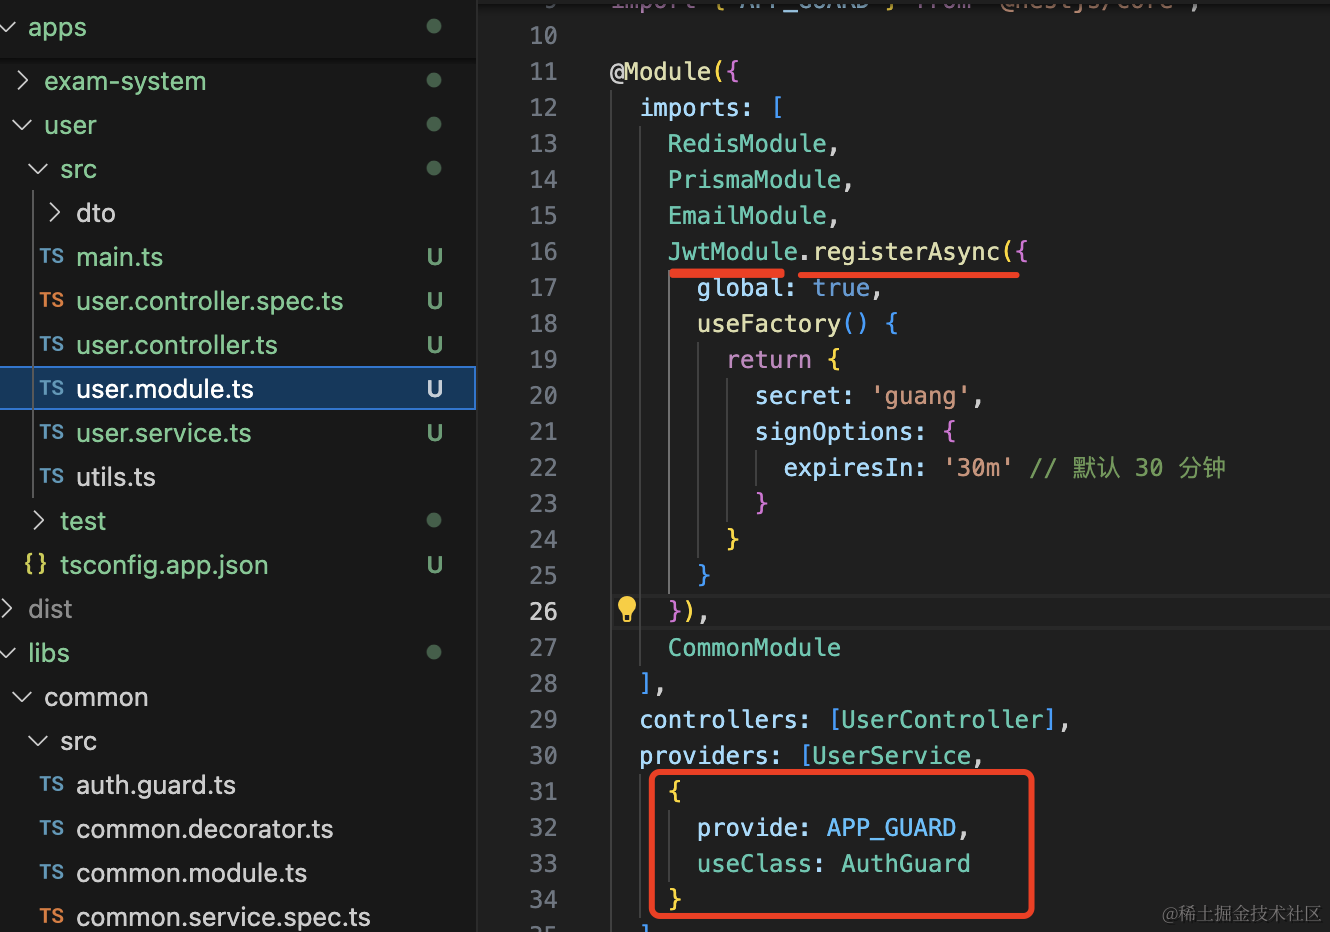
在 CommonModule 里引入就好了:

JwtModule.registerAsync({
  global: true,
  useFactory() {
    return {
      secret: 'guang',
      signOptions: {
        expiresIn: '30m' // 默认 30 分钟
      }
    }
  }
}),
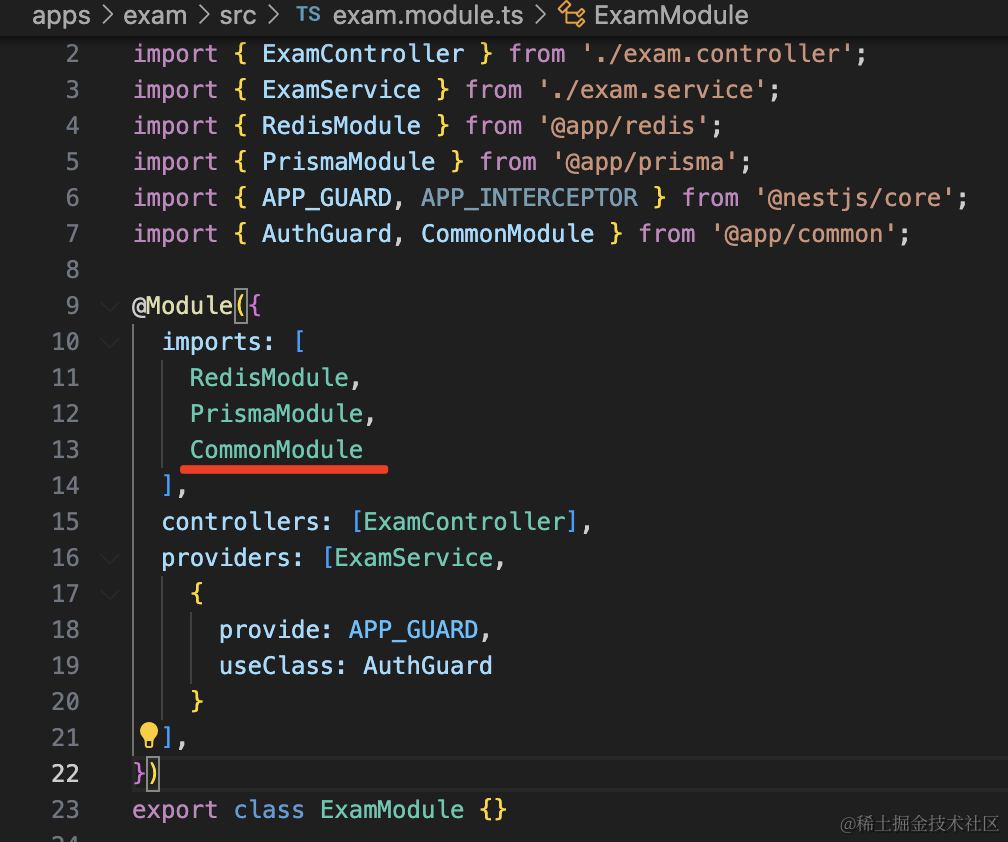
然后在 UserModule、ExamModule 里引入 CommonModule,自然也就引入了 JwtModule:
再跑下:
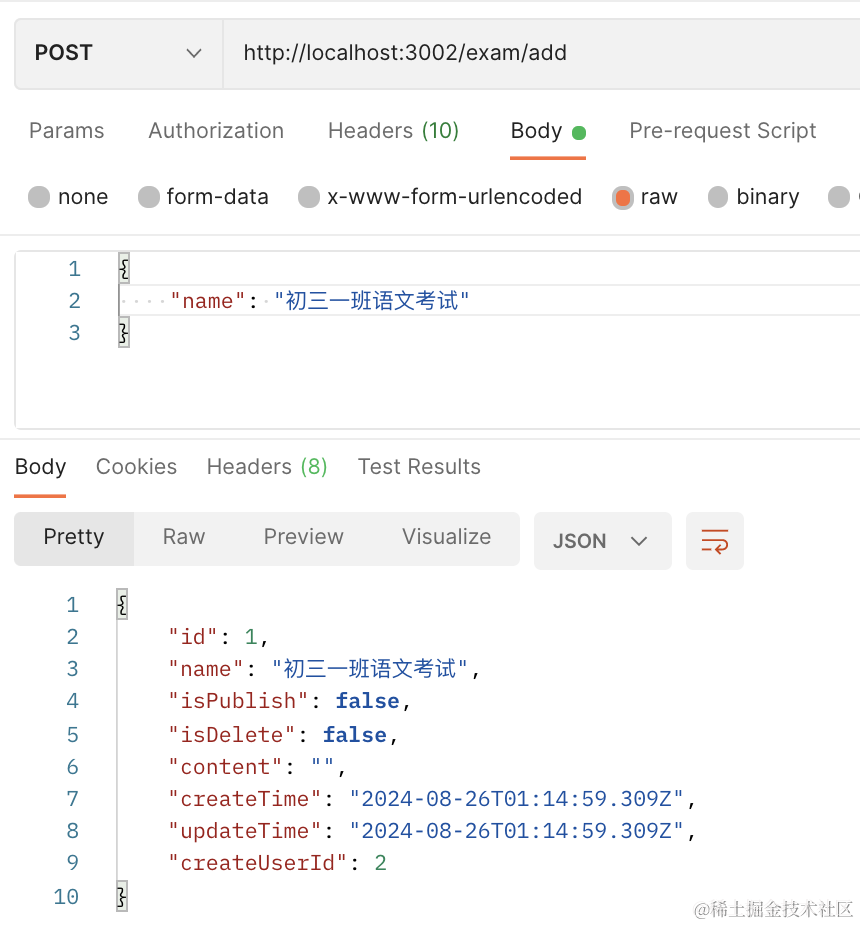
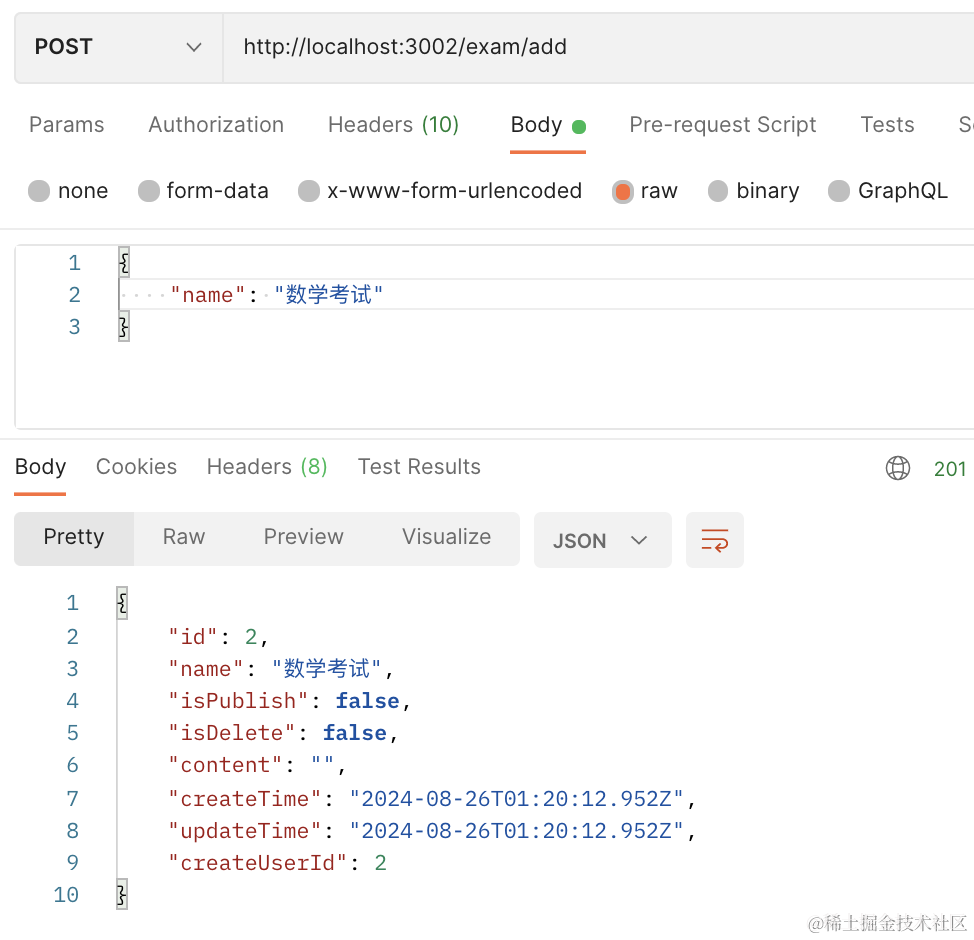
带上 token 访问接口。
可以看到创建成功了。

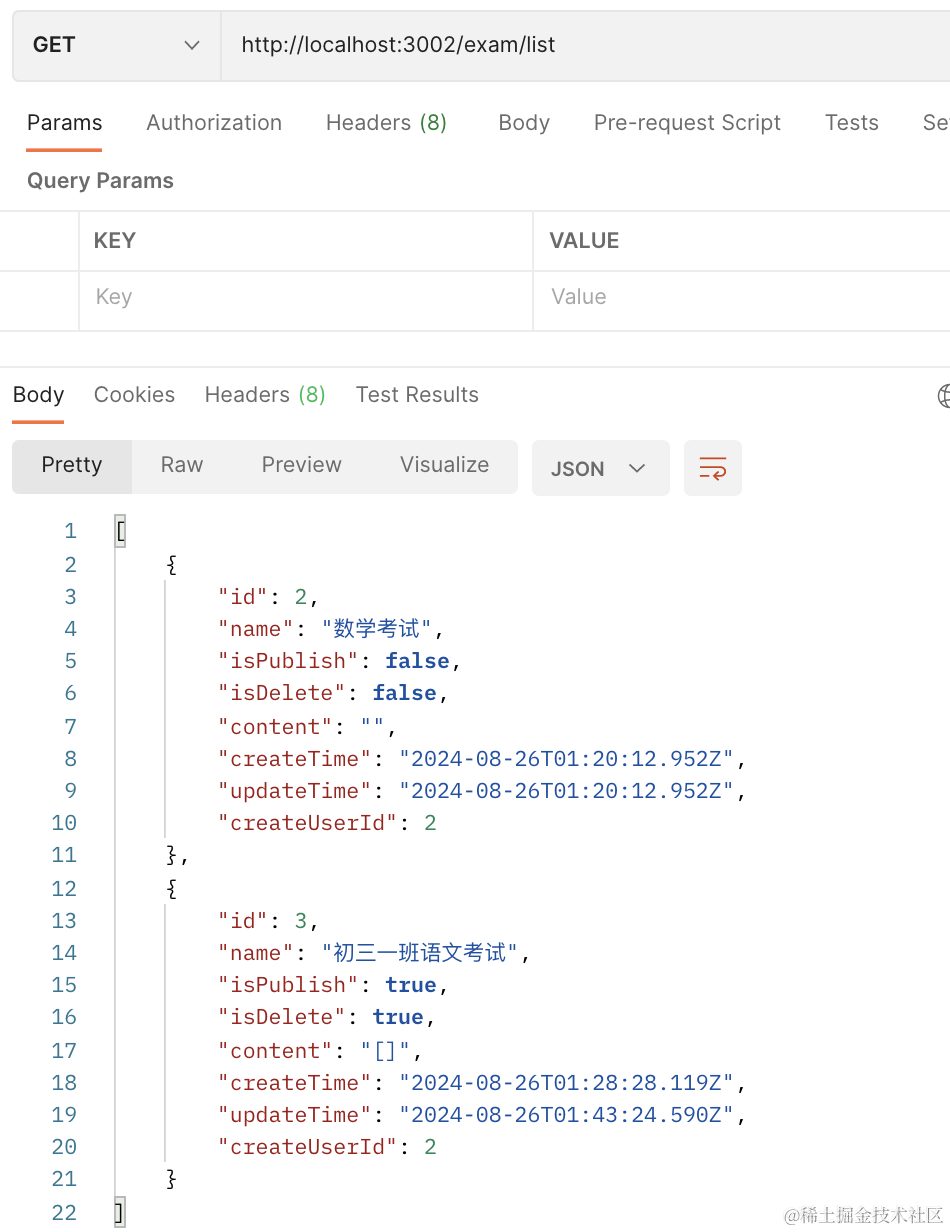
然后我们再实现下 list 接口:
添加一个路由:
@Get('list')
@RequireLogin()
async list(@UserInfo('userId') userId: number) {
    return this.examService.list(userId);
}
在 service 实现 list 方法:
async list(userId: number) {
    return this.prismaService.exam.findMany({
      where: {
        createUserId: userId
      }
    })
}
查询当前用户的所有考试。
测试下:
先创建一个:
查询下:
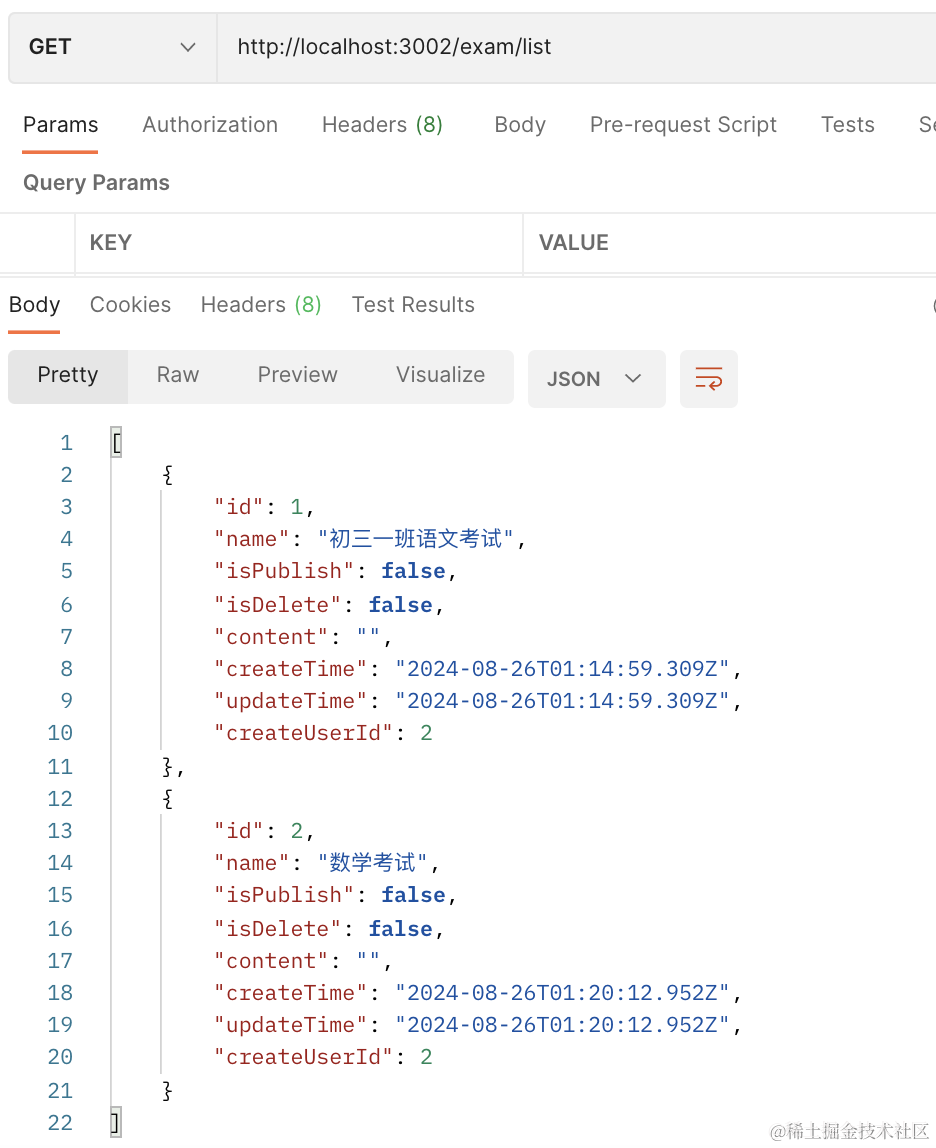
没啥问题。
然后继续实现删除考试接口:
@Delete('delete/:id')
@RequireLogin()
async del(@UserInfo('userId') userId: number, @Param('id') id: string) {
  return this.examService.delete(userId, +id);
}
在 service 里实现下:
async delete(userId: number, id: number) {
    return this.prismaService.exam.update({
      where: {
        id,
        createUserId: userId
      },
      data: {
        isDelete: true
      }
    })
  }
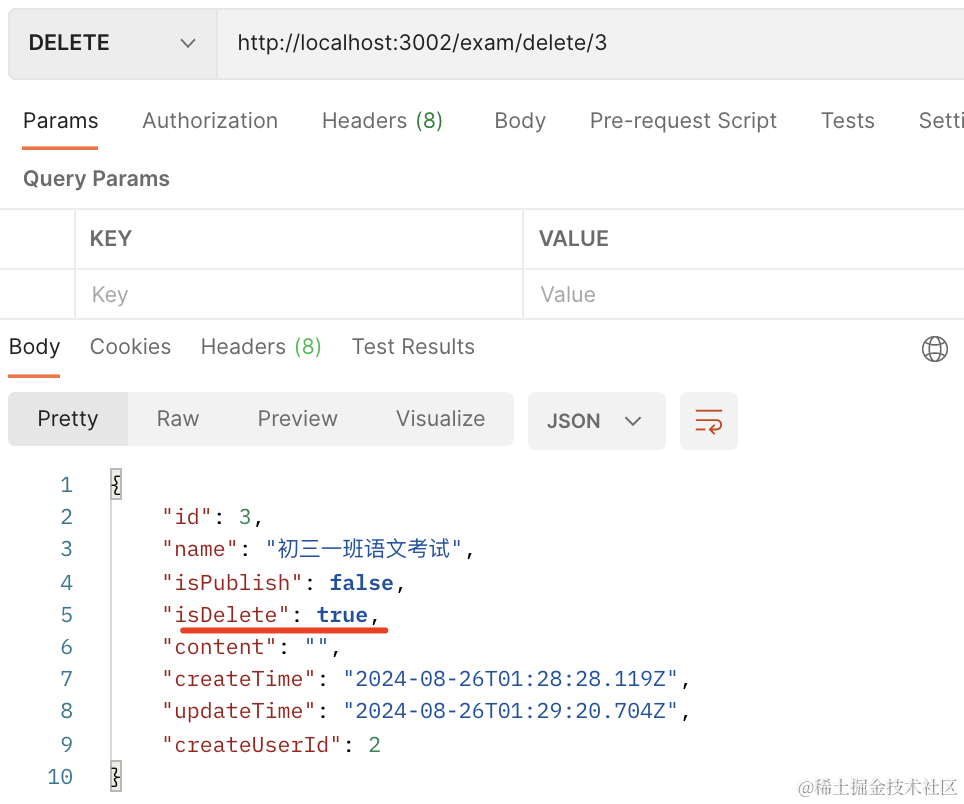
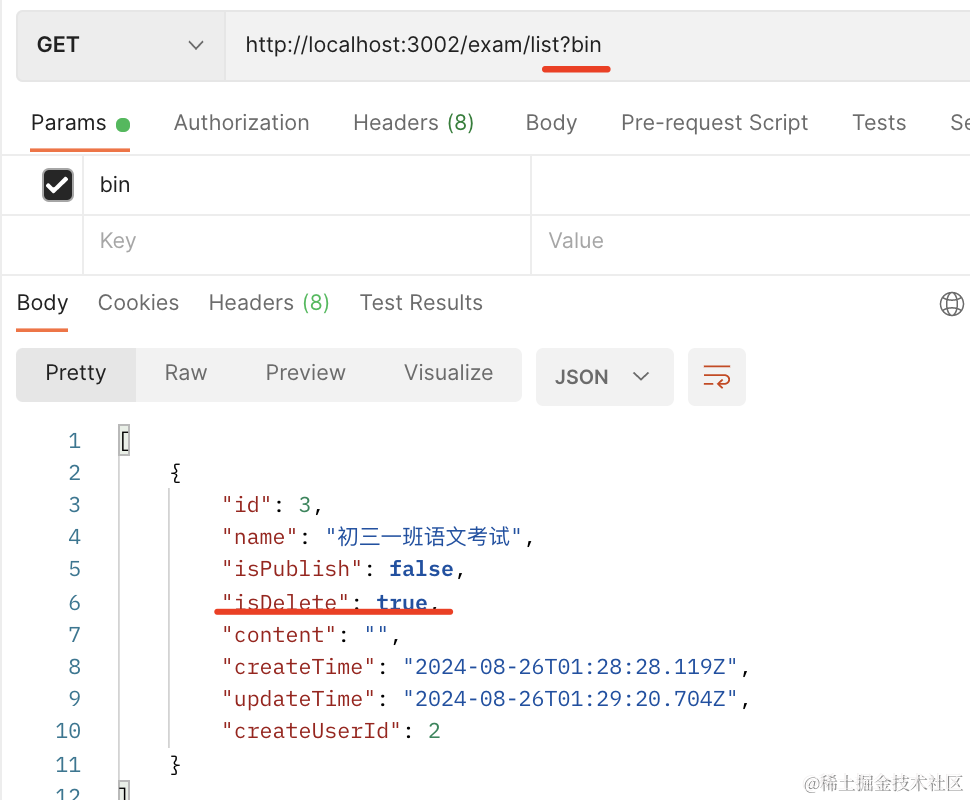
因为有回收站功能,所以这里只做逻辑删除,把 isDelete 设置为 true 就行。
试下效果:
当然,这个 list 接口也得改下:
@Get('list')
@RequireLogin()
async list(@UserInfo('userId') userId: number, @Query('bin') bin: string) {
    return this.examService.list(userId, bin);
}
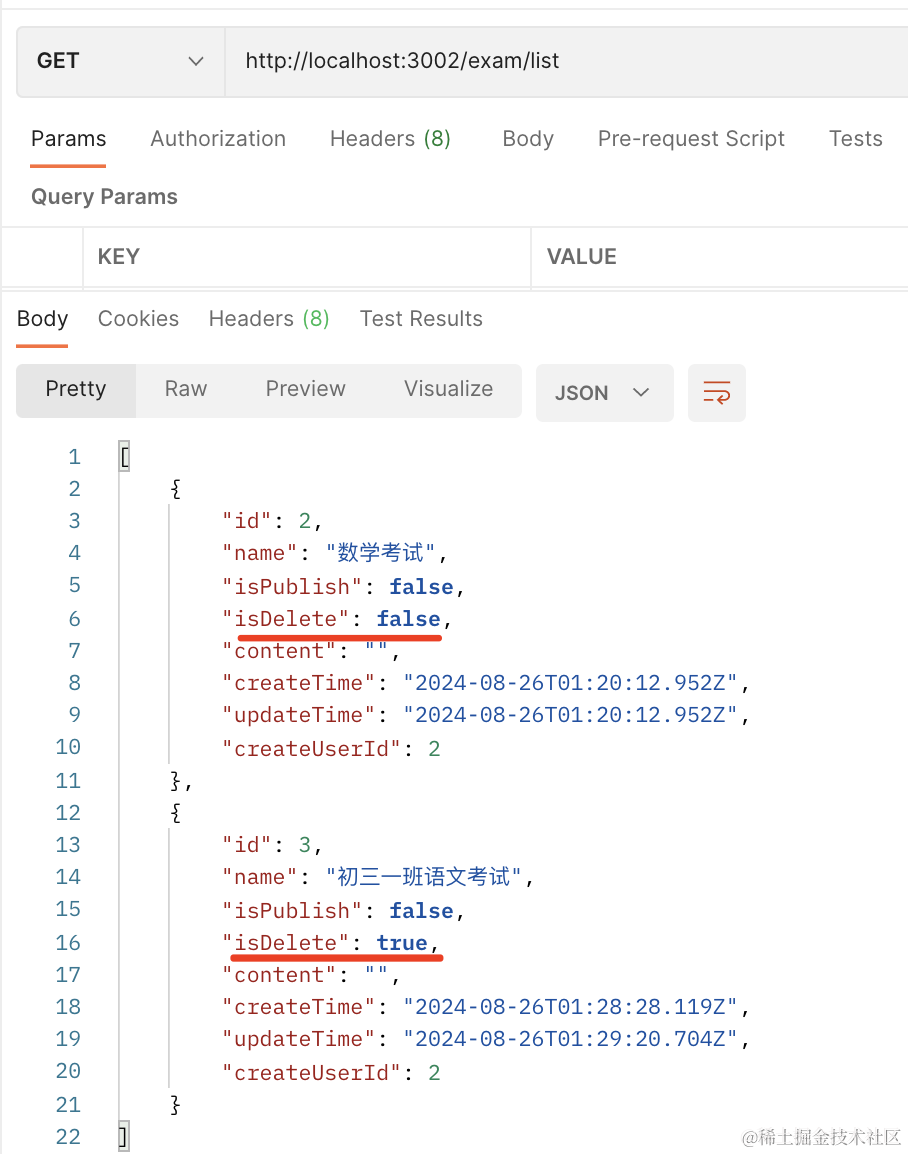
只要传了 bin 参数,就查询回收站中的,否则返回正常的列表。
async list(userId: number, bin: string) {
    return this.prismaService.exam.findMany({
      where: bin !== undefined ? {
        createUserId: userId,
        isDelete: true
      } : {
        createUserId: userId,
      }
    })
}
接下里实现保存考试内容的功能。
| 接口路径 | 请求方式 | 描述 |
|---|---|---|
| /exam/add | POST | 创建考试 |
| /exam/delete | DELETE | 删除考试 |
| /exam/list | GET | 考试列表 |
| /exam/save | POST | 保存试卷内容 |
| /exam/publish | GET | 发布考试 |
这个就是修改 content:
添加路由:
@Post('save')
@RequireLogin()
async save(@Body() dto: ExamSaveDto) {
    return this.examService.save(dto);
}
创建 dto: dto/exam-save.dto.ts
import { IsNotEmpty, IsString } from "class-validator";

export class ExamSaveDto {
    @IsNotEmpty({ message: "考试 id 不能为空" })
    id: number;

    @IsString()
    content: string;
}
实现下 service:
async save(dto: ExamSaveDto) {
    return this.prismaService.exam.update({
      where: {
        id: dto.id
      },
      data: {
        content: dto.content
      }
    })
}
测试下:
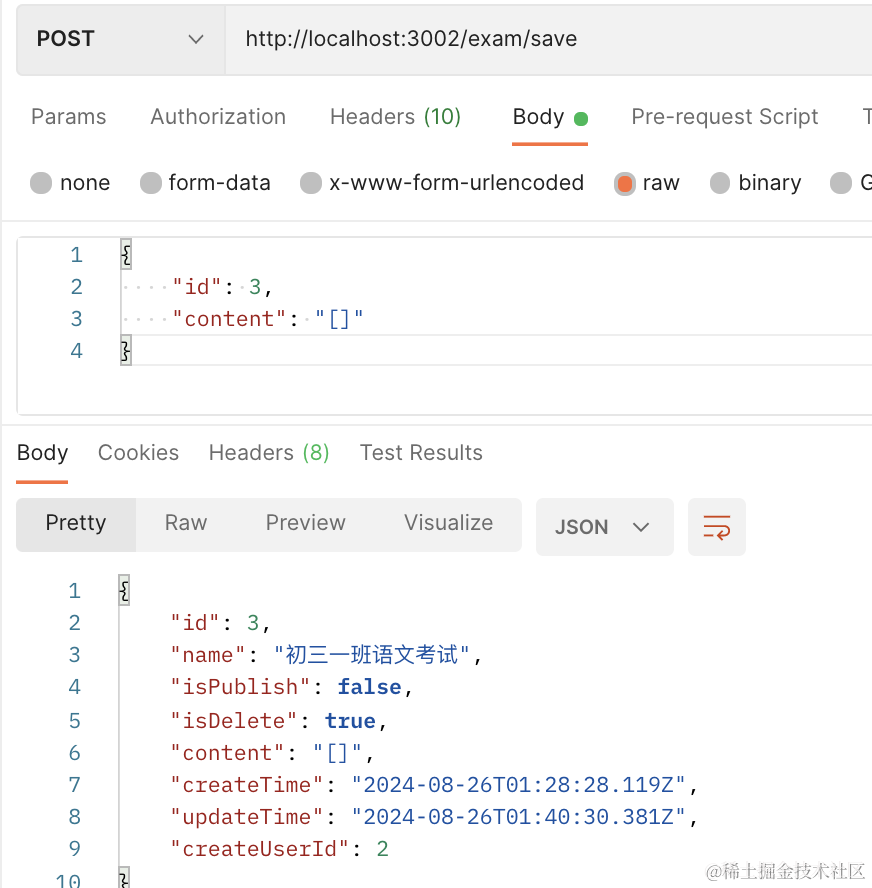
保存成功。
最后再来实现发布方法:
这个其实也是改个字段,把 exam 的 isPublish 改为 true 就好了:
@Get('publish/:id')
@RequireLogin()
async publish(@UserInfo('userId') userId: number, @Param('id') id: string) {
    return this.examService.publish(userId, +id);
}
async publish(userId: number, id: number) {
    return this.prismaService.exam.update({
      where: {
        id,
        createUserId: userId
      },
      data: {
        isPublish: true
      }
    })
}
测试下:
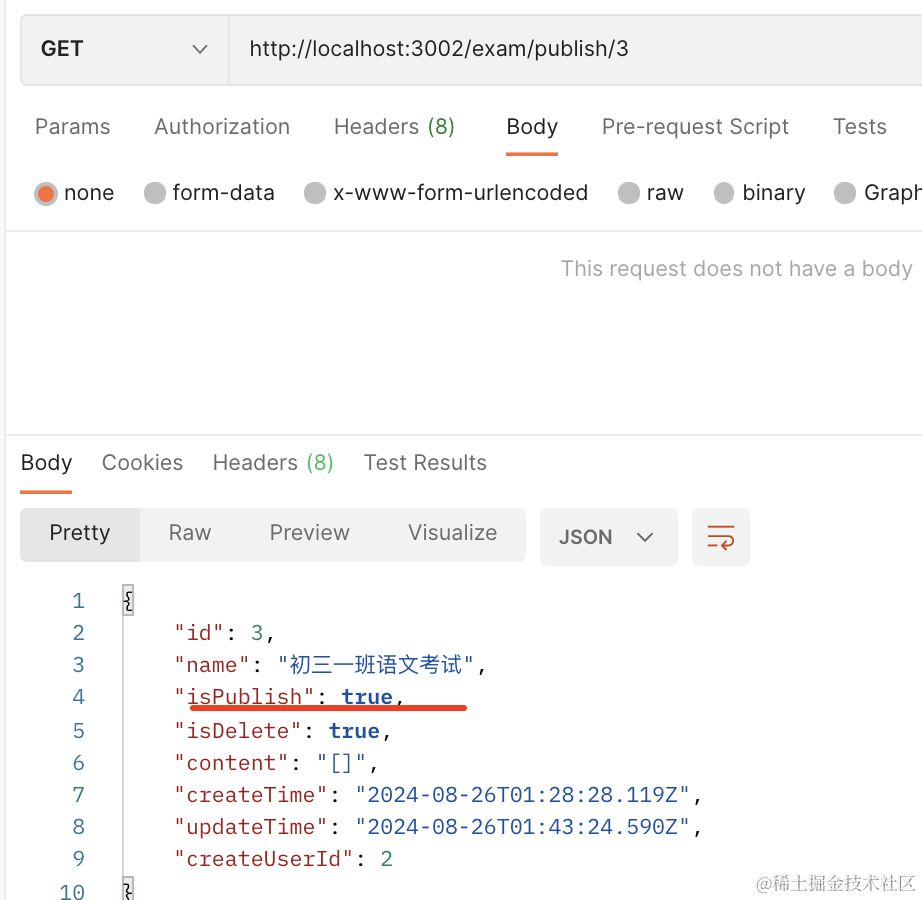
这样,考试微服务的接口就完成了。
代码在小册仓库。
总结
这节我们实现了考试微服务的接口,包括考试列表、考试创建、考试删除、发布考试、保存试卷内容的接口。
当然,具体试卷内容的 JSON 格式还没定,等写前端代码的时候再说。